PIP and Python Modules inside Blender

If you want to install additional Python [1] modules inside your Blender [2] environment, you can install PIP using this recommended script [3], then use PIP to install all modules that you want. Note Blender’s Python Virtualenv location is /path_to_blender/blender_version/python/bin/python and you need to use this particular interpreter to launch the script.

[1] https://www.python.org/
[2] https://www.blender.org/
[3] https://pip.pypa.io/en/stable/installing/

MacPorts Python 3.6.0 and NumPy/SciPy import bug

Python 3.6.0 NumPy and SciPy from MacPorts crash on import bug [1].
[1] https://trac.macports.org/ticket/53453

OrangeADE: Orange Autonomous Device Evaluation

I have recently started the OrangeADE project [1], that is Orange Autonomous Device Evaluation, an online platform to evaluate security level of network equipment and verify against known vulnerabilities. OrangeADE is released as Open-Source under the “new” 3-Clause BSD license. Enjoy the work in progress! :-)

[1] https://github.com/CeDeROM/OrangeADE

Is Blend4Web a Blender Game Engine replacement?

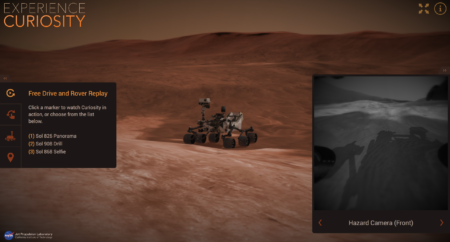
You just need to see this awsome Mars Curiosity [1] simuluator [2] made by NASAJPL [3] with Blender3D [4] Blend4Web [5] HTML5 [6] WebGL [7] Free and Open-Source Software :-)

Screen Shot 2017-01-15 at 15.25.15

[1] https://www.nasa.gov/mission_pages/msl
[2] https://eyes.nasa.gov/curiosity
[3] http://www.jpl.nasa.gov
[4] https://www.blender.org
[5] https://www.blend4web.com
[6] https://www.w3.org/TR/html5
[7] https://www.khronos.org/webgl

Blender 3D and DS4 PS4 Bluetooth controller

Blender 3D can work with DualShock4 Playstation4 wireless controller over Bluetooth [1].

[1] http://www.blendswap.com/blends/view/78315

FreeBSD Synaptics Trackpad/Touchpad

Use advanced features of your Synaptics Trackpad on a laptop running FreeBSD [1] with:

  • set in /boot/loader.conf:
    hw.psm.synaptics_support="1"
  • set in /etc/rc.conf:
    moused_enable="YES"
  • set in /etc/X11/xorg.conf:
    Section "InputDevice"
        Identifier      "Mouse0"
        Driver          "mouse"
        Option          "Protocol"      "auto"
        Option          "Device"        "/dev/sysmouse"
        Option          "ZAxisMapping"  "4 5 6 7"
    EndSection

If you want to have “MacBook” like two-finger scrolling along with other parameters you can set in /etc/sysctl.conf:

hw.psm.synaptics.min_pressure=16
hw.psm.synaptics.max_pressure=220
hw.psm.synaptics.max_width=10

hw.psm.synaptics.vscroll_hor_area=1300
hw.psm.synaptics.vscroll_ver_area=-600
hw.psm.synaptics.vscroll_min_delta=50
hw.psm.synaptics.vscroll_div_min=100
hw.psm.synaptics.vscroll_div_max=150

hw.psm.synaptics.weight_current=3
hw.psm.synaptics.weight_previous=6
hw.psm.synaptics.weight_previous_na=20
hw.psm.synaptics.weight_len_squared=2000

hw.psm.synaptics.div_min=9
hw.psm.synaptics.div_max=17
hw.psm.synaptics.div_max_na=30
hw.psm.synaptics.div_len=100

hw.psm.synaptics.margin_top=200
hw.psm.synaptics.margin_right=200
hw.psm.synaptics.margin_bottom=200
hw.psm.synaptics.margin_left=200

hw.psm.synaptics.window_min=4
hw.psm.synaptics.window_max=10
hw.psm.synaptics.multiplicator=10000

[1] https://wiki.freebsd.org/SynapticsTouchpad

FreeBSD NTFS FUSE FSTAB

If you want to use NTFS volumes on FreeBSD [1], you need to use FUSE infrastructure andNTFS-3G [2] port. Syntax of fstab is a bit differen in this case:

/dev/ntfs_partition /mnt/ntfs_mounpoint fuse rw,locale=pl_PL.UTF8,mountprog=/usr/local/bin/ntfs-3g 0 0

Also remember to put fuse_load=”YES” in /boot/loader.conf and install the sysutils/fusefs-ntfs port. Do not use hibernated volumes.

[1] https://www.freebsd.org
[2] https://www.freshports.org/sysutils/fusefs-ntfs

FreeBSD on a Hybrid Graphics Laptop

If you happen to get a nice laptop with a powerful graphics card, such as polish HYPERBOOK SL502VR [1], it is highly probable that you will use UEFI boot mode. In that case you need to use SCFB [2] driver instead of VESA. Use the xf86-video-scfb package to get Xorg running.

Hybrid Graphics at first used MUX device that did a LCD connect to a selected video card on boot. Nowadays both cards use common Video Framebuffer [3] to draw over a screen. The simple video card (Intel in my case) is always active, while the more powerful and power consuming video card is started on-demand (nVidia in my case). This however requires a dedicated DMA BUF implementation, which is not yet available on FreeBSD, so none of the cards can see any monitor connected, resulting in “No Screens Found Error” from Xorg.

I have already reported a bug/feature request to nVidia. Also developers of FreeBSD are working on the Hybrid Graphics implementation.

[1] http://sklep.hyperbook.pl/hyperbook-sl502-vr-p651rp6g-gtx-1060-p-25965.html
[2] https://wiki.freebsd.org/Graphics/SCFB
[3] https://en.wikipedia.org/wiki/Framebuffer

Chromecast / Google Home wizard bug

Google Chromecast is a device that allows you to stream audio-video content over WiFi network from Application to a HDMI enabled display. This works really nice when you want to watch Netflix or show some movies from your mobile device on large screen TV/Projector.

Recently, Google released a new line of Chromecast devices that support audio only and higher resolution displays, renaming Chromecast to Google Home. This rebrand also replaced mobile application for devices management. New application forces user to have working internet connection, use localization, and sign with google account in order to work. There is no way to roll back to old application. Not really cool.

I have found and reported one nasty bug in this new Google Home application (version 1.19.29), that prevents you from discovering and setting up old Chromecast devices after Factory Defaults Reset or WiFi password change (so it can connect to your WiFi again). I only have old device so I am not sure how this affects new devices. You will not be able to discover your Chromecast device over WiFi when Localization Services are disabled and according permission was not granted!! In order to connect to your Chromecast:

  • Reinstall or clear application data/cache.
  • In startup configuration wizard you must grant access to localization services. If you do not enable localization and allow it to work granting permissions, you will not find your Chromecast later on.
  • Search now for a Chromecast device still in setup wizard, you will find it, only if you did previous step correctly.
  • Note that when you find a device that way, you can skip sign in with google account.
  • If you do not grant localization permissions you will not be able to detect your chromecast device anymore.

I hope this has nothing to do with killing old line of devices with a software update. I also hope Google will fix this issue in next releases and they really don’t force users to give up so many personal information (why do they need GPS/Bluetooth running for a simple WiFi connection otherwise)..

FreeBSD Port devel/protobuf3

Created a FreeBSD Port for Google Protobuf version 3.1.0 :-)

https://bugs.freebsd.org/bugzilla/show_bug.cgi?id=214957

Cura Configuration Reference Manual

Starting up the Configuration Reference Manual for Ultimaker CURA 3D printing Open-Source software :-)

https://github.com/Ultimaker/Cura/wiki/Cura-Configuration-Reference-Manual

FreeBSD DHCP Client options

My request for base DHCP Client options parsing was partially implemented.

OpenSC breaks GnuPG/SC on OSX

If you happen to work on OSX with MacPorts and GPGTools using SmartCard for SSH then installing OpenSC (0.16.0 in my case) will break your smart card access for GPG/SSH. If you remove OpenSC with an uninstall utility things get back to normal.

Bug in Credit Card related script in Allegro

I have just found and reported bug in credit card related form/script in popular Polish trading platform Allegro. This was just a minor compatibility issue.. ;-)

Google Hangouts related feedback

I have just reported several issues and ideas related with this nice Google Hangouts Android application:

  • The name Hangouts is not popular and hard to remember. Abandoning “Google Chat” or “Google Talk” was a bad idea. People tend to remember short names and popular words such as “Skype” or “Viber”. This may be funny but people really cannot remember “Hangouts” well.
  • Receiving calls is misleading. There are several different ways to answer an incoming call in Hangouts. Most common way is to press a button and then drag it onto an icon that is not visible until you press a button. Another way is top view pop-up which could have color buttons in addition to small icons. Older people have problem with this. Average non-geek user simply needs Green Answer and Red Reject button.
  • Hangouts would be simpler to use and more popular if it worked just as an ordinary Phone Call application. Non-geek users have this habit already on how to use Phone Call application, that Hangouts should leverage.
  • Hangouts voice/video call should be available directly from a Contact Book if gmail address is present. Just as phone call.
  • There are Android devices that offer hardware phone buttons (such as LG Wine Smart). Green Connect and Red Disconnect buttons should be also available to perform actions in Hangouts.

These simple ideas arised from observing older people trying to use Hangouts to videocall their family members..

Android Game Controller

It is possible to connect a game controller to Android based device and use it as input for your application [1].

[1] https://developer.android.com/training/game-controllers/index.html

Android USB OTG HOST

Most modern Android based devices support USB OTG function [1]. USB is a Host centric bus that means there is only one Host device and many different Devices can be connected to it. Using inexpensive USB-OTG cable it is possible to swich smarphone USB port from Device to Host, and connect external devices, if chipset and OS build allows this. Google provides detailed information on how to code USB Host [2] in your application.

[1] http://www.usb.org/developers/onthego/
[2] https://developer.android.com/guide/topics/connectivity/usb/host.html

Xperia Android Bootloader Unlock

It is very kind of Sony that they created an easy way to unlock Bootloader of Xperia Android Smartphones. You can now customize your phone firmware and OS :-)

http://developer.sonymobile.com/unlockbootloader/unlock-yourboot-loader/

Docker is NOT a Virtual Machine Hypervisor

Some people confuse Docker to be a virtualization hypervisor host. Unlike VirtualBox or QEmu, Docker is an automated container system tightly related with a Linux system (only). It is something like Jails for FreeBSD (that has been there for years already).

Joomla portal access recovery

In case you need to reset admin password for a Joomla install, you can do this by simply updating database record.

$ mysql5 -h <database_hostname> -u <database_username> -p <database_name>
Enter password: <database_password>
mysql> show tables;
(...)
mysql> UPDATE <database_prefix>_users SET password='d2064d358136996bd22421584a7cb33e:trd7TvKHx6dMeoMmBVxYmg0vuXEA4199' WHERE username='admin';

This will use mysql5 commadline client to connect to a given database. You will see if tables are in place. Then you will update password hash of user admin to secret which equals:

d2064d358136996bd22421584a7cb33e:trd7TvKHx6dMeoMmBVxYmg0vuXEA4199

You can also use any other database client of your choice, DBeaver is also nice utility with graphical user interface.

You can obtain necessary database access information from configuration.php file accessed by ssh/ftp on a web server.

public $dbtype = 'mysqli';
public $host = '<database_hostname>';
public $user = '<database_username>';
public $password = '<database_password>';
public $db = '<database_name>';
public $dbprefix = '<database_prefix>';

If you want to dump/backup a database into local file, use mysqldump5:

mysqldump5 -h <database_hostname> -u <database_username> -p <database_name> > dumpfile.sql

If you want to restore a database from a local file, use mysql5:

mysql5 -h <database_hostname> -u <database_username> -p <database_name> < dumpfile.sql

Google Android Nexus Device Un-Brick

GoogleNexus

If you happen to brick your Google Nexus device you can always use stock ROM images [1] to revert it to a default and operational state. Package contains not only OS but also bootloader and radio firmware images!

I have bricked my device by installing custom firmware that messed partitions layout inside a Flash Memory. I have seen lots of people having similar problem of endless bootloader-loop. There is no need to send a device to a service when bootloader is operational. All you need is a stock firmware image from Google [1], USB cable, and fastboot utility from Android SDK. If you happen to damage a bootloader, then hardware manipulation at low-level is necessary over JTAG, I can help to recover your device in that case.. no worries :-)

[1] https://developers.google.com/android/nexus/images

Android: dynamic string processing

There are two easy ways to replace text on-the-fly in Android. This may be required if you want to insert some text/values into displayed text, or construct a data packet of some sort. Both require some code to replace given part of the string.

First is to use HTML/XML tags and then handle them with your own implementation of Html.handleTag(). Unfortunately, String conversion removes the tag in the background, so you need to escape < mark with &lt; in the string resource. This approach is good when you want to put variables inside a string and then process them later in one place using tag handling – that is when you want to have a tag handled at processing time – so you only change tags and one processing routine.

Second is to use Format Strings instead of XML/HTML tags. It seems simpler, faster, and evades hidden conversion problems. getString(resource, ...) works like a well known printf(string, ...). This approach is good when you want to process each string manually at runtime, but strings and variables are hardcoded.

[1] http://stackoverflow.com/questions/7899563/android-converting-between-strings-spannedstrings-and-spannablestrings/34556513#34556513

Dualshock4 PS4 Controller Bluetooth Pairing

dualshock4-bluetooth-pair-cederom

There is one simple way I have discovered to pair with Dualshock4 Playstation4 controller using standard Bluetooth Pairing Procedure. Make sure controller is turned off, then press and hold SHARE button, then press and hold PLAYSTATION button until LED starts to blink (two short white blinks every few seconds). You can now discover and enjoy your Dualshock4 controller with any Bluetooth (HID) enabled device. No cables and no additional applications necessary! :-)

Dualshock4 is a really nice high quality and precise controller that can be used in many more interesting applications than only playing games. It is compatible with Bluetooth HID and USB HID standard. It contains 2 analog joysticks, 2 analog sliders, 13 buttons, touch-pad, accelerometer, vibrator, audio speaker with headset port, RGB LED, micro-USB port, and external expansion port..

Unfortunately, lack of self-compatibility seems to be a strong disadvantage of Playstation platform. Not only because PS4 does not run old software. Dualshock4 seems to have different way of handling button events as compared to Dualshock3 (default Playstation3 controller). It has some sort of auto-repeat feature (like PC BIOS keyboard) instead of button change events (like MIDI). This renders Dualshock4 unreliable on Playstation3 platform because of massive control glitches. Also DS4 PS button does not produce system menu on PS3, so you cannot use it as the main controller replacement. Sadly, it is impossible to use DS3 controller on PS4 as well. Hopefully, switching CPU to AMD64 and OS to FreeBSD could bring more self-compatibility to Playstation in future..

HackRF(One) on FreeBSD

My port of HackRF has been committed. Enjoy your HackRF One SDR on FreeBSD OS! =)

Fixing corrupted GPT backup

When you setup system on a fresh disk you may encounter a problem of corrupted GPT backup. This will happen even more likely when you messed with MBR before on that disk. Free and Open GDISK utility will help you. GDISK will tell you current state of the disk and partition tables, also warn you on possible problems. When you print available partitions (‘p’) and they seem okay, you can simply write out (‘w’) the partition table, that would fix the GPT backup corruption problem :-)

RAID HDD and UEFI BIOS

If you want to build your own disk array, let’s say RAID, on your computer to increase disk space and efficiency, you should know about few important things in general:

  • You can consider MBR and x86 obsolete. New way is GPT, UEFI, AMD64.
  • Large RAID arrays (over 2TB) will not work with older hardware and OS (except FreeBSD) due to architecture limitations.
  • To use large RAID volumes you must use GPT partition scheme. MBR will not do the job.
  • Some systems can use GPT only with UEFI BIOS (i.e. Windows works with GPT only via UEFI). You may be forced to buy new motherboard.
  • UEFI and GPT is totally different way of bootstrap so you can forget what you know about BIOS and MBR here.
  • Hard Drives have hidden corruption-fix mechanisms in firmware that will make your RAID array fail to operate. For RAID choose dedicated drives such as WD RED (not Green, not Black, not Blue).

In order to use GPT and UEFI I have replaced my nice ASUS M4A88TD-V EVO/USB3 motherboard with M5A97 R2.0 only because M4 series did not support UEFI. New BIOS is totally different, but I am not really sure if replacing the hardware was mandatory..

Summing up, if you want to use large RAID volumes make sure first that you can use GPT and UEFI BIOS is present on your AMD64 hardware. If not, still you can use the FreeBSD as it knows how to bypass some limitations. Also remember to use dedicated HDD for RAID operations.

No USB Mouse/Keyboard in Windows 7 installer

If you find keyboard/mouse to be missing when installing Windows7 on a new hardware, make sure you are connected to USB2.0 ports not USB3.0. New hardware host of USB3.0 may not yet be supported by older installer software.

Mac OSX USB installer

In order to create OSX installer on USB memory drive you need to:

  • Download the Mac OSX Yosemite installer from AppStore on you Mac.
  • Create installation media from Terminal by executing following command (remember to adjust YOURUSBVOLUME value):

    sudo /Applications/Install\ OS\ X\ Yosemite.app/Contents/Resources/createinstallmedia --volume /Volumes/YOURUSBVOLUME --applicationpath /Applications/Install\ OS\ X\ Yosemite.app --nointeraction
  • Boot target Mac from USB by pressing ALT/OPTION key while powering-on the computer.
  • Remember to format target drive first with Disk Utility if you want to perform clean installation.

Mac OSX Bluetooth Modem resource busy

In case you wonder why your device does not connect as Modem via Bluetooth to the Mac OSX, or you cannot see COM port on Windows, your mobile device may not simply support or provide DUN (Dial Up Network) and/or SPP (Serial Port Profile) profile.

On Mac OSX I got following error, until I tried another device and/or starting by hand DUN service on a mobile/client machine:

cannot open /dev/cu.Bluetooth-Modem: Resource busy

Notes:

  • Read Bluetooth specification for Serial Port Profile.
  • Read Bluetooth specification for Dial-Up Network Profile.
  • Modern mobile phones / USB 3G dongles, unfortunately, do not provide direct AT/Hayes access to the Radio Modem anymore.
  • You can install DUN application for your smartphone, but it will be only a simple dummy wrapper imitating modem for simple applications, but they do not provide full modem functionality, beware, its a fake.
  • Its only necessary for devices to be paired first in order to get SPP/DUN working. If device does not provide serial port over bluetooth when devices are paired and online, probably its just not there implemented.

FreeBSD sFTP SSHD chroot nologin

There are situations when you have a nice server out there, and you want/need someone to upload important files, but you only want to give them a minimal access to the system. You can use SSHD with sFTP and /sbin/nologin shell for that in chroot environment (dedicated limited userspace). Note that SCP in fact requires a working shell, so you need to use sFTP in this case..

Create a new user account with existing ftp group and /sbin/nologin shell:

# adduser

Alternatively you can modify an existing account to share:

# pw groupmod ftp -m username
# pw usermod username -s /sbin/nologin

You need to set correct permissions to the user home directory and public directory inside for upload:

# chown root:wheel /home/username
# mkdir /home/username/public
# chown username:ftp /home/username/public

Now modify the SSHD server configuration file /etc/ssh/sshd_config and append:

Match Group ftp
        ChrootDirectory         /home/%u
        ForceCommand            internal-sftp
        AllowTcpForwarding      no
        PermitTunnel            no
        X11Forwarding           no

Remember to restart the SSHD in order to apply new configuration:

# service sshd restart

Once the account is not necessary anymore remember to remove it:

# pw userdel username

OSX 10.10 Yosemite install/runtime problem

If you want to perform a fresh installation of OSX 10.10 Yosemite on an older MacBook(Pro) you can obtain the installer with AppStore and then create the USB installation media.

In case you encounter an Installer Verification Error that prevents you from installing the new system try the following. Its not the system date not bad download as internets says.

This may also help you when encountering problems (i.e. USB Mass Storage) after system upgrade to Yosemite.

Try these boot keyboard shortcuts until you hear boot sound two times:

  • Cmd+Alt+R+P when powering on the Mac (NVRAM Reset)
  • Alt+Ctrl+Shift+PowerON alltogether (SMC Reset)

No problem, you are wolcome :-)

Apple MacBook and OS X

I have, finally, switched to Apple OS X. This is so close to my favorite FreeBSD (OSX is a Unix BSD / Darwin derivative) and it has all drivers and multimedia features working, that I think I will switch for good. This the simple, stable, and functional platform, where you can really focus on your work. Along with the MacPorts suite installed that provide access to the Open-Source / Free-Software I feel like home :-)